Using Servlet Code for JDBC
First, we create a directory for our web application named JdbcWeb under “C:\apache-tomcat-8.5.37\webapps”. This directory consists of two sub-directories namely src and WEB-INF. A Servlet program is created with the name JdbcServlet.java to make the JDBC connection. It is placed within the sub-directory src under JdbcApp. The WEB-INF sub-directory consists of the Deployment Descriptor (DD) i.e. web.xml and two sub-sub-directories namely classes and lib. Basically, classes contains the .class files which are to be created during compilation along with the package structure. Here, lib has the JDBC Type 4 driver for MySQL 8.0.15 named mysql-connector-java-8.0.15.jar. The whole directory structure is shown below:
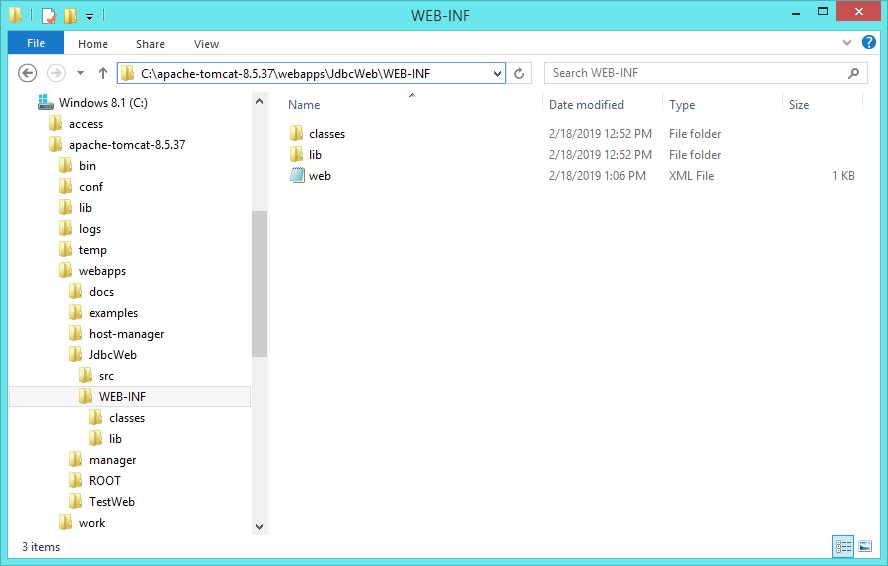
Figure 1: The directory structure of the web application
The Deployment Descriptor (DD) i.e. web.xml for our Java Servlet application is given below:
<web-app>
   <servlet>
      <servlet-name>JdbcServlet</servlet-name>
      <servlet-class>com.example.JdbcServlet</servlet-class>
   </servlet>
   <servlet-mapping>
      <servlet-name>JdbcServlet</servlet-name>
      <url-pattern>/test.do</url-pattern>
   </servlet-mapping>
</web-app>
The complete Servlet code is given below:~
import javax.servlet.*;
import javax.servlet.http.*;
import java.io.*;
import java.sql.*;

//JdbcServlet.java
public class JdbcServlet extends HttpServlet {

   public void processRequest(HttpServletRequest request, HttpServletResponse response)
   throws ServletException, IOException {

      Connection con = null;
      Statement stmt = null;
      ResultSet rs = null;

      PrintWriter out = response.getWriter();
      response.setContentType("text/html");
      String url = "jdbc:mysql://localhost:3306/test?useSSL=false&allowPublicKeyRetrieval=true";
      String user = "root";
      String pass = "system";

      try {
         Class.forName("com.mysql.cj.jdbc.Driver").newInstance();
         con = DriverManager.getConnection(url, user, pass);
         out.println("Successfully connected to " + "MySQL server using TCP/IP... + "<br>");
         stmt = con.createStatement();
         rs = stmt.executeQuery("select * from students");

         while (rs.next()) {
            out.println("Roll = " + rs.getInt(1) + " Name = " + rs.getString(2) + "<br>");
         }
      }
      catch (Exception e) {
            out.println("Exception: " + e.getMessage());
      }
      finally {
         try {
            if (con != null) {
               con.close();
            }
         }
         catch (SQLException e) { }
      }
  }

  //for "HTTP GET" method
  public void doGet(HttpServletRequest request, HttpServletResponse response)
    throws ServletException, IOException {
         processRequest(request, response);
  }

  //for "HTTP POST" method
  public void doPost(HttpServletRequest request, HttpServletResponse response)
    throws ServletException, IOException {
         processRequest(request, response);
  }

}
The procedure for compiling the code and running the Tomcat service (startup.bat) from command prompt is given below:~
C:\> set classpath=C:\apache-tomcat-8.5.37\lib\servlet-api.jar;

C:\> cd apache-tomcat-8.5.37\webapps\JdbcWeb\src

C:\apache-tomcat-8.5.37\webapps\JdbcWeb\src> javac -d ..\WEB-INF\classes JdbcServlet.java

C:\apache-tomcat-8.5.37\webapps\JdbcWeb\src> cd ..\..\..\bin

C:\apache-tomcat-8.5.37\bin> startup.bat
Using CATALINA_BASE: "C:\apache-tomcat-8.5.37"
Using CATALINA_HOME: "C:\apache-tomcat-8.5.37"
Using CATALINA_TMPDIR: "C:\apache-tomcat-8.5.37\temp"
Using JRE_HOME: "C:\Program Files\Java\jdk1.8.0_162"
Using CLASSPATH: "C:\apache-tomcat-8.5.37\bin\bootstrap.jar;C:\apache-tomcat-8.5.37\bin\tomcat-juli.jar"
Now we open a web browser (Google Chrome) to send the Web URL (http://localhost:8085/JdbcWeb/test.do) to the Tomcat Server. The output is given below:
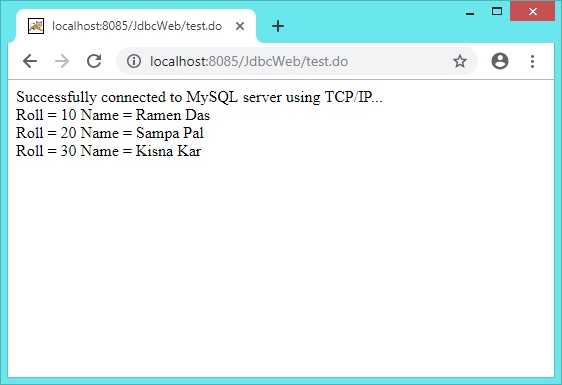
Figure 2: The output of the Java Servlet code using JDBC
In the next section we will learn how to create JSP code using JDBC concept.