JSP Custom Tag Libraries
In JavaServer Pages technology, actions are elements that can create and access programming language objects and affect the output stream. The JSP specification defines some standard actions that must be provided by any compliant JSP implementation. In addition to the standard actions, JSP technology supports the development of reusable modules called custom actions. A custom action is invoked by using a custom tag in a JSP page. A tag library is a collection of custom tags.
Some examples of tasks that can be performed by custom actions include form processing, accessing databases and other enterprise services such as email and directories, and flow control. Before the availability of custom actions, JavaBeans components in conjunction with scriplets were the main mechanism for performing such processing. The disadvantage of using this approach is that it makes JSP pages more complex and difficult to maintain.
Custom actions alleviate this problem by bringing the benefits of another level of extension to JSP pages. Custom actions encapsulate recurring tasks so that they can be reused across more than one application and increase productivity by encouraging division of labor between library developers and library users. JSP tag libraries are created by developers who are proficient at the Java programming language and expert in accessing data and other services. JSP tag libraries are used by Web application designers who can focus on presentation issues rather than being concerned with how to access databases and other enterprise services.
A Tag is a class that implements the javax.servlet.jsp.tagext.Tag interface. It is used to encapsulate functionality that can be used from a JSP page. Examples might be conditional logic, database access, iterations and so on. Every tag is mapped to a particular class file which is executed whenever the tag is encountered in a JSP file.
The general syntax:
<%@ taglib uri = “...” prefix = “...” %>
The parent of the tag is the JSP tag within which it is nested, if there isn’t one, its set to null. There are two things to remember while using TAGLIB’s:
- The Class file should be created and it should be deployed in the Servlet folder of the web server.
- The class file should implement the Tag and BodyTag interfaces.
The mapping of a particular tag to a particular Java class file should be done in the “taglib.tld” file. The tag is then ready to be used in the JSP file. This file is placed under WEB-INF directory.
The taglib file forms the central description for the tag library. This file is an XML document that defines the tag’s operation. It maps the tag name on the page to the implementing class. It defines inputs to the class. It references the helper class that provides details of any output variables set by the tag class.
Currently, a Tag can be either of two flavors: BodyTag or Tag (sometimes referred to as ‘Simple Tag’). We will focus on the Tag in this section. This Tag and BodyTag have some methods; all these methods are callback methods.
Tag methods: doStartTag()
doEndTag()
BodyTag methods: doAfterBody()
Coding Example of JSP Custom Tag
1. Firstly create a Tag handler class using the program named ‘HelloWorldTag.java‘ as shown below:
package com.example.tag;

import javax.servlet.jsp.*;
import javax.servlet.jsp.tagext.*;

public class HelloWorldTag implements Tag {

  //To keep track of the Tag's parent and the PageContext
  private PageContext pageContext;
  private Tag parent;

  public HelloWorldTag() {
     super();
  }

  public int doStartTag() throws javax.servlet.jsp.JspTagException {
     return SKIP_BODY;
  }

  public int doEndTag() throws javax.servlet.jsp.JspTagException  {
      try {
        pageContext.getOut().write("Hello World!");
      }
      catch(java.io.IOException e) {
        throw new JspTagException("IO Error: " + e.getMessage());
      }
      return EVAL_PAGE;
  }

  public void release() {}

  public void setPageContext(final javax.servlet.jsp.PageContext pageContext) {
    this.pageContext=pageContext;
  }

  public void setParent(final javax.servlet.jsp.tagext.Tag parent) {
      this.parent=parent;
  }

  public javax.servlet.jsp.tagext.Tag getParent() {
      return parent;
  }

}
NOTE: It is to be noted that in the above Java code the method doStartTag() returns the SKIP_BODY value. This will make sure that no evaluation of the tags body will take place. If we wanted evaluation of the body of the tag, we would have returned EVAL_BODY_INCLUDE instead.
Following that, we will implement the method doEndTag() which will try to write “Hello World!” to the output stream back to the client, which in the end is our JSP page. Note that the method returns the EVAL_PAGE value. This means that the rest of the JSP page will be evaluated. If we don’t want that to happen, we would return the SKIP_PAGE value.
The method release() is where we normally do our cleaning up. Due to the nature of this simple tag, we will not do anything here.
The method setPageContext() gets called by the JSP container and is used to set the Tag’s PageContext. We will never have to worry about this method, as long as we just remember to let our Tag remember its PageContext.
The method setParent() gets called by the JSP container and is used to set the Tag’s parent-Tag. As with the PageContext, we need to remember our parent. Finally, the method getParent() has to be implemented.
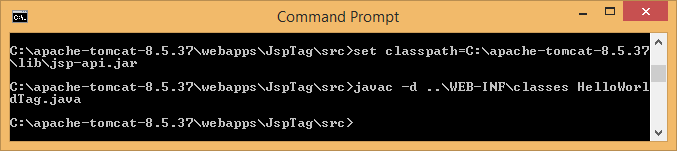
Let’s consider that Java class file is placed into the following directory with the package structure mentioned here:
C:\apache-tomcat-8.5.37\webapps\JspTag\WEB-INF\classes
In order to compile the above Java file we need to include the jsp-api.jar in our classpath. This can be done like this:
2. Then create the Tag Library Descriptor (TLD) file named ‘taglib.tld‘ as given below:
<taglib>
    <tlib-version>1.0</tlib-version>
    <jsp-version>1.2</jsp-version>
    <short-name>mt</short-name>
    <tag>
        <name>helloWorld</name>
        <tag-class>com.example.tag.HelloWorldTag</tag-class>
    </tag>
</taglib>
3. The deployment descriptor called ‘web.xml‘ is very simple as shown below:
<web-app>
</web-app>
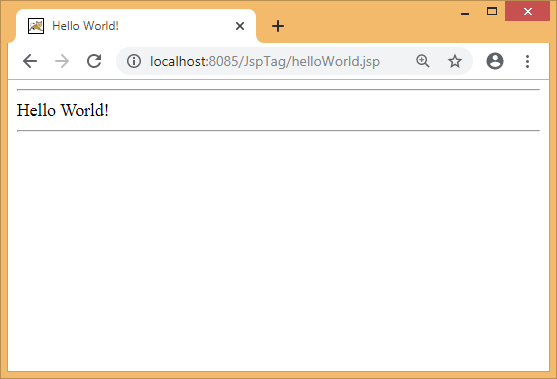
4. The content of the JSP file named ‘helloWorld.jsp‘
is given below:
<%@ taglib uri="mytags" prefix="mt" %>
<HTML>
    <HEAD>
        <TITLE>Hello World!</TITLE>
    </HEAD>
    <BODY BGCOLOR="#FFFFFF">
        <HR>
        <mt:helloWorld/>
        <HR>
    </BODY>
</HTML>
The example codes are placed within JspTag sub-directory under the webapps directory. Now open the URL http://localhost:8085/JspTsg/helloWorld.jsp in a web browser. Hopefully the result looks like this: