JDBC Connection Pooling
Establishing JDBC connections is resource-expensive, especially when the JDBC API is used in a middle-tier server environment, such as when MySQL driver for JDBC is running on a Java-enabled web server. In this type of environment, performance can be improved significantly when connection pooling is used. Connection pooling means that connections are reused rather than created each time a connection is requested. To facilitate connection reuse, a memory cache of database connections, called a connection pool, is maintained by a connection pooling module as a layer on top of any standard JDBC driver product.
Connection pooling is performed in the background and does not affect how an application is coded; however, the application must use a DataSource object (an object implementing the DataSource interface) to obtain a connection instead of using the DriverManager class. A class implementing the DataSource interface may or may not provide connection pooling. A DataSource object registers with a Java Naming and Directory Interface (JNDI) naming service. Once a DataSource object is registered, the application retrieves it from the JNDI naming service in the standard way. For example:
InitialContext initialContext = new InitialContext();
Context context = (Context) initialContext.lookup("java:comp/env");
//The JDBC Data source that we just created
DataSource ds = (DataSource) context.lookup("connpool");
If the DataSource object provides connection pooling, the lookup returns a connection from the pool if one is available. If the DataSource object does not provide connection pooling or if there are no available connections in the pool, the lookup creates a new connection. The application benefits from connection reuse without requiring any code changes. Reused connections from the pool behave the same way as newly created physical connections. The application makes a connection to the database and data access works in the usual way.
Connection connection = ds.getConnection();
Requirements
- NetBeans IDE (this tutorial uses NetBeans 8.2)
- Tomcat (Tomcat 8 that is bundled within NetBeans)
- MySQL database
- MySQL Java Driver
Steps to be performed
We perform the following steps for this experiment.
1. Database creation: Assuming the MySQL database is ready, connect to it and create a database. Lets call it connpool:
mysql> create database connpool;
Now we create and populate the table from which we will fetch the data:
mysql> use connpool;
mysql> create table players(id int(5) not null unique auto_increment, name varchar(255) not null, country varchar(255) not null);
mysql> insert into players(name, country) values
("Virat Kohli", "India"),
("Steve Smith", "Australia"),
("David Warner", "Australia"),
("Joe Root", "England"),
("Kane Williamson", "New Zealand");
Now, we have completed the database part.
2) Building Web Application: We now create our web application.
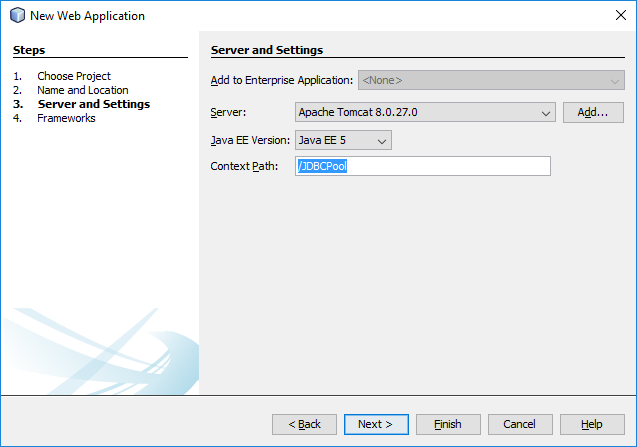
In NetBeans IDE, click File → New Project… Select Java Web → Web Application
The, Click Next and give the project the name JDBCPool. Click Next.
Choose the server as Tomcat and Java EE version as Java EE5. Since we are not going to use any frameworks, click Finish.
The project will be created and the start page, index.jsp, opened for us in the IDE.
3) Creating connection pooling parameters: Now we create the connection pooling parameters. In the Projects window, expand configuration files and open “context.xml“. We will see that the IDE has added this code for us:
<?xml version="1.0" encoding="UTF-8"?>
<Context path="/JDBCPool"/>
Delete the last line:
<Context path="/JDBCPool"/>
and then add the following to the context.xml file. I have explained the sections along the way. Make sure we edit our MySQL username and password appropriately:
<?xml version="1.0" encoding="UTF-8"?>
<Context antiJARLocking="true" path="/JDBCPool">
<Resource name="connpool" auth="Container" type="javax.sql.DataSource"
maxActive="100" maxIdle="30" maxWait="10000"
username="root" password="system" driverClassName="com.mysql.cj.jdbc.Driver"
url="jdbc:mysql://localhost:3306/connpool?useSSL=false&allowPublicKeyRetrieval=true"/>
</Context>
Next, expand the JDBCPool node: JDBCPool → Configuration Files. We will now have the file “web.xml“:
Delete everything in the file and paste this code:
<?xml version="1.0" encoding="UTF-8"?>
<web-app version="2.5" xmlns="http://java.sun.com/xml/ns/javaee" xmlns:xsi="http://www.w3.org/2001/XMLSchema-instance" xsi:schemaLocation="http://java.sun.com/xml/ns/javaee http://java.sun.com/xml/ns/javaee/web-app_2_5.xsd">
    <resource-ref>
        <description>DB Connection</description>
        <res-ref-name>connpool</res-ref-name>
        <res-type>javax.sql.DataSource</res-type>
        <res-auth>Container</res-auth>
    </resource-ref>
    <welcome-file-list>
        <welcome-file>index.jsp</welcome-file>
    </welcome-file-list>
</web-app>
That is it for the connection pool. We now edit our code to make use of it.
4) Editing JSP page: Edit index.jsp by adding this code just after the initial coments but before <%@page contentType=…
<%@page import="javax.naming.Context"%>
<%@page import="java.sql.ResultSet"%>
<%@page import="java.sql.PreparedStatement"%>
<%@page import="java.sql.SQLException"%>
<%@page import="java.sql.Connection"%>
<%@page import="javax.sql.DataSource"%>
<%@page import="javax.naming.InitialContext"%>
After adding some code in the <body> section of the page the index.jsp program will look like this:
index.jsp
<%@page contentType="text/html" pageEncoding="UTF-8"%>
<!DOCTYPE html>
<%@page import="javax.naming.Context"%>
<%@page import="java.sql.ResultSet"%>
<%@page import="java.sql.PreparedStatement"%>
<%@page import="java.sql.SQLException"%>
<%@page import="java.sql.Connection"%>
<%@page import="javax.sql.DataSource"%>
<%@page import="javax.naming.InitialContext"%>
<html>
<head>
<meta http-equiv="Content-Type" content="text/html; charset=UTF-8">
<title>JDBC Connection Pool</title>
</head>
<body>
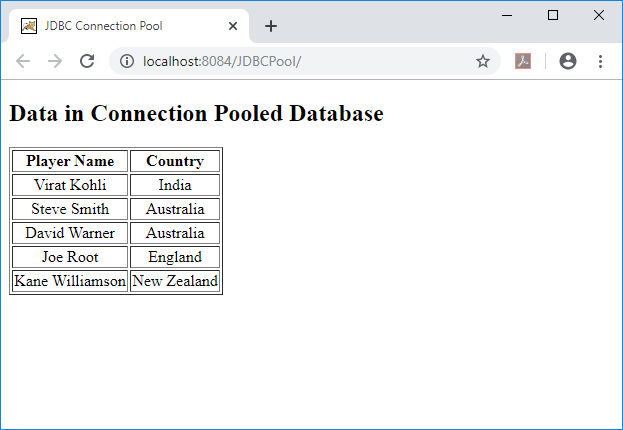
<h2>Data in Connection Pooled Database</h2>
<table border="1">
<th>Player Name</th><th>Country</th>
<%
InitialContext initialContext = new InitialContext();
Context context = (Context) initialContext.lookup("java:comp/env");
//The JDBC Data source that we just created
DataSource ds = (DataSource) context.lookup("connpool");
Connection connection = ds.getConnection();
if (connection == null)
{
throw new SQLException("Error establishing connection!");
}
String query = "select * from players";
PreparedStatement statement = connection.prepareStatement(query);
ResultSet rs = statement.executeQuery();
while (rs.next()) {
%>
<tr>
<td><center><%=rs.getString(2)%></center></td>
<td><center><%=rs.getString(3)%></center></td>
</tr>
<% } %>
</table>
</body>
</html>
5) Running the application: Now, we test the connection pool by running the web application:
Final Comments
If anyone wants to have the one connection pool used in multiple applications, he/she need to edit the following two files:
1. <tomcat_install_folder>/conf/web.xml
Just before the closing </web-app> tag, add the code
<resource-ref>
        <description>DB Connection</description>
        <res-ref-name>connpool</res-ref-name>
        <res-type>javax.sql.DataSource</res-type>
        <res-auth>Container</res-auth>
</resource-ref>
2. <tomcat_install_folder>/conf/context.xml
Just before the closing </Context> tag, add the code
<Resource name="connpool" auth="Container" type="javax.sql.DataSource"
maxActive="100" maxIdle="30" maxWait="10000"
username="root" password="system" driverClassName="com.mysql.cj.jdbc.Driver"
url="jdbc:mysql://localhost:3306/connpool?useSSL=false&allowPublicKeyRetrieval=true"/>
Now we can use the pool without editing XML files in each of your applications. Just use the sample code as given in index.jsp