JSP Using JavaBeans
JavaBeans components are Java classes that can be easily reused and composed together into applications. Therefore a JavaBean can be defined as a reusable software component. What this means is that we can write a JavaBean that can then be used in a variety of other Java based softwares such as applications, Servlets or JSP pages. In this way we can define our business logic within a JavaBean and then consistently use that logic in separate applications. In many ways they are analogous to Microsoft’s COM and ActiveX technologies. JavaBeans can also have a visual component in a manner similar to the ActiveX controls that can be dragged-and-dropped into a Visual Basic application.
Benefits of JavaBeans
By using JavaBeans we can fully separate the business logic from the generation of the display. This is an important philosophy that leads to better structured and more maintainable systems. We would use the JavaServer Page to dynamically generate display and also to handle the user interaction. The JavaBean would take over when we need to perform some complex data processing or when we need to access databases or the file system.
The other advantage of using JavaBeans is that the business logic can be used by more than one application. For example, both a client based Java application and a JSP page can access the same JavaBean thus guaranteeing the same functionality.
A final point to note is that by using JavaBeans we can split our development team into Java experts and HTML experts. The Java experts would write and develop the JavaBeans and the HTML experts would concentrate of the design of the web application.
Example JavaBean
More specifically a JavaBean is just a Java class that adheres to the following rules,
- It is a public class.
- It has a public constructor with no arguments.
- It has public getter and setter methods to read and write to properties.
Properties are always accessed using a common naming convention. For each property two methods must exist: a getXxx() and a setXxx() method where xxx is the name of the property and of a private instance variable. They are called getter and setter methods respectively.
This is an important point as we can easily get tripped up with the syntax. For example, if we want a property called fileName then we would need to define an instance variable called fileName and two methods: getFileName() and setFileName(). Notice the change of case of the f in ‘fileName’. The example codes are placed within BeanTest directory (under webapps).
EmployeeBean.java
package com.example;

public class EmployeeBean {
  private String firstName = "";
  private String lastName  = "";

  //First Name property
  public void setFirstName(String name) {
    firstName = name;
  }

  public String getFirstName() {
    return firstName;
  }

  //Last Name Property
  public void setLastName(String name) {
    lastName = name;
  }

  public String getLastName() {
    return lastName;
  }

  //Full Name Property - Read Only
  public String getFullName() {
    return firstName + " " + lastName;
  }

}
This JavaBean is a bit trivial. It has three properties firstName, lastName and fullName. The last property is read only as it doesn’t have a set method.
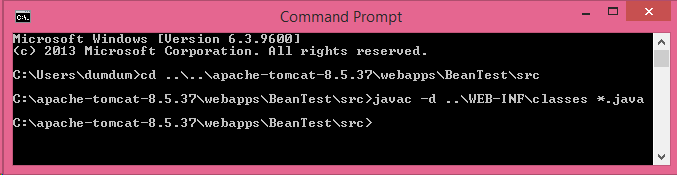
Now, compile the JavaBean using the following way (as shown in cmd):
JavaBeans and JSP
JavaServer Pages technology directly supports using JavaBeans components with JSP language elements. We can easily create and initialize beans and get and set the values of their properties. This section provides basic information about JavaBeans components and the JSP language elements for accessing beans in our JSP pages.
JSP Actions for JavaBeans:
To use a JavaBean in our JSP page we make use of three JSP actions that we saw earlier. They are,
- <jsp: useBean/> – find or instantiate a JavaBean
- <jsp: setProperty/> – sets the property of a JavaBean
- <jsp: getProperty/> – gets the value of a JavaBean property
The first of these is used to specify which JavaBean we want to use in our page. The next two actions, as their names suggest, are used to set and get values of properties of the JavaBean.
The useBean Action
See the following syntax for “useBean”.
Syntax:
<jsp:useBean id="beanID" scope="beanScope" class="package.beanName" />
Here, beanID is the variable we use in our code to reference the Bean, beanScope is the scope the Bean has. It can take one of the following values:
Value | Description |
page | It lasts until the page completes and there is no storage of state. |
request | The JavaBean instance lasts for the client request and so will remain if the request is forwarded. |
session | The JavaBean lasts as long as the client session. |
application | The JavaBean is instantiated with the application and remains in use until the application ends. |
The package and beanName refer to the package and name of the JavaBean we wish to use. Note, some applications servers require that we also use the page import directive to reference the package or class that contains the JavaBean
The setProperty and getProperty Actions
These are used to set and read property values.
Syntax
<jsp:setProperty name="bean" property="propertyName" value="val" />

<jsp:getProperty name="bean" property="propertyName" />
where beanID is the variable name used in the <jsp:useBean/> tag and propertyName is the name of the property we are setting or getting.
To use a variable as either a property or a more often as a value then, between the quotes, enter a JSP expression that returns the value of the variable. For example,
<jsp:setProperty name="empBean" property="firstName" value="<%= strFirst %>" />
where strFirst is a variable used in the page.
Example JSP
The following JSP code (EmpBeanTest.jsp) illustrates how to access a JavaBean from a JSP page. The JavaBean being used here is the one we saw earlier in the item “Example JavaBean”.
EmpBeanTest.jsp
<html>
<head>
<title>Simple Java Bean</title>
</head>
<body>
<%
String last = "Guru";
%>
<jsp:useBean id="EmployeeBean" scope="page" class="com.example.EmployeeBean" />
<%-- Set bean properties --%>
<jsp:setProperty name="empBean" property="firstName" value="Tech" />
<jsp:setProperty name="empBean" property="lastName" value="<%= last %>" />
<%-- Get bean properties --%>
<P>
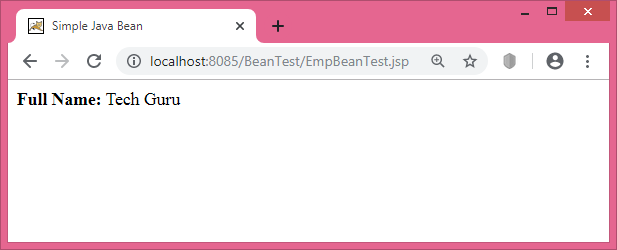
<b>Full Name:</b> <jsp:getProperty name="empBean" property="fullName" />
</P>
</body>
</html>
Note, we can also call the associated property methods directly within Java code using syntax similar to,
empBean.setFirstName("Tech");
empBean.setLastName("Guru");
String name = empBean.getFullName();
The output is shown below:
Another JavaBean Example
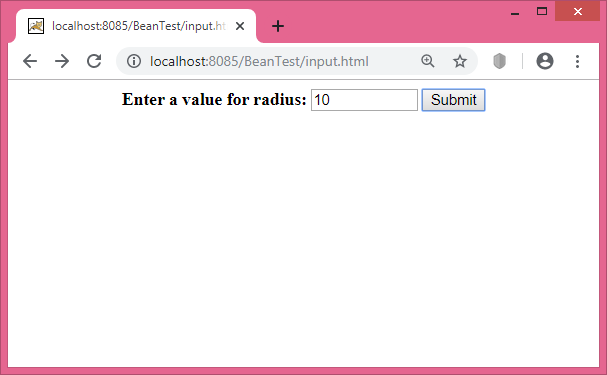
Let’s take another Bean Example which will calculate the area of a circle provided its radius value is given. This radius value is taken as input from a HTML form. After clicking the “Submit” button in the HTML form, the control will be transferred to a JSP page which will call the Bean. The example codes are placed within BeanTest directory (under webapps).
The Example JavaBean
Circle.java
package com.example;

public class Circle {
    double radius;
    double area;

    public void setRadius(double r) {
       radius = r;
    }

    public double getRadius(){
       return radius;
    }

    public double getArea(){
       return 3.14*radius*radius;
    }

}
The HTML form
input.html
<html>
<body>
<center>
<form name="Form1"  method="post" action="CircleTest.jsp">
<B>Enter a value for radius:</B>
<input type=text name="data" size=10 value="">
<input type=submit value="Submit">
</form>
</body>
</html>
The JSP Page
CircleTest.jsp
<html>
<head>
<title>JSP Page</title>
</head>
<body>
<%!
String value;
double result;
%>
<%
value = request.getParameter("data");
result = Double.parseDouble(value);
%>
<jsp:useBean id="circle1" class="com.example.Circle" scope="page" />
<jsp:setProperty name="circle1" property="radius" value="<%= result %>" />
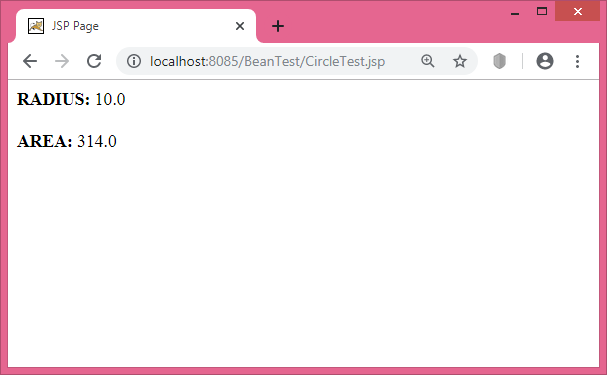
<b>RADIUS: </b> <jsp:getProperty name="circle1" property="radius" />
<br><br>
<b>AREA </b> <jsp:getProperty name="circle1" property="area" />
</body>
</html>
The output is shown below:
After clicking the “Submit” button the output will be: